Without question, Photoshop is one of the most preferred and most favorite image editing software for graphic designers, digital painters and photographers alike. With each revision, Adobe adds more power to the program.
In this article we will be looking at 5 tips and tricks you can use in Photoshop.
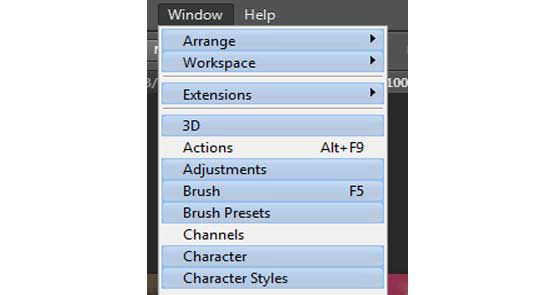
One fast way of getting up to speed with the latest changes is to go to Window>Workspace>New in Photoshop CS6. This closes all the panels and replaces them with the above section with a panel showing all the new features.
In addition, if you now return to the Window menu, you will see various features highlighted as in the screenshot below:
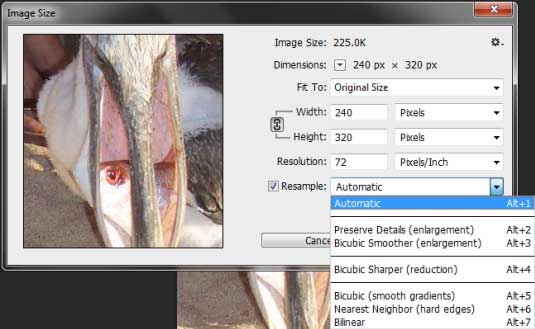
In Photoshop CC a new feature allows you to increase the size of bitmaps with negligible quality loss. In the past, one could increase the size of an image, but it would blur and artifacts would become visible.
To activate it, go to Image>Image Size. In the screen shot above, note the Re-sample option at the bottom of the dialog box. This gives you many options for controlling the quality of the image as you increase the size.
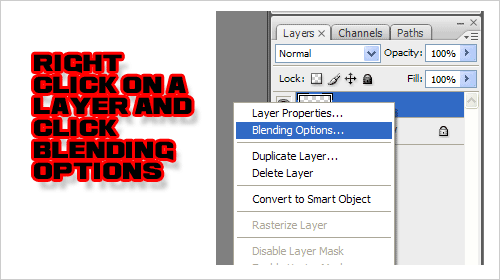
If you right click on a layer in the layers toolbar, and then click blending options this will bring you to a whole vast array of effects that will keep you busy for hours. Use these options very sparingly.
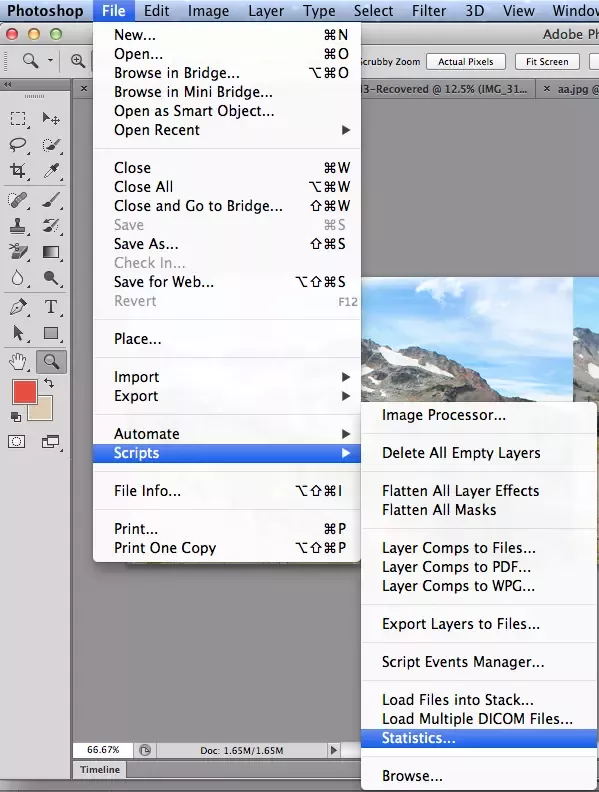
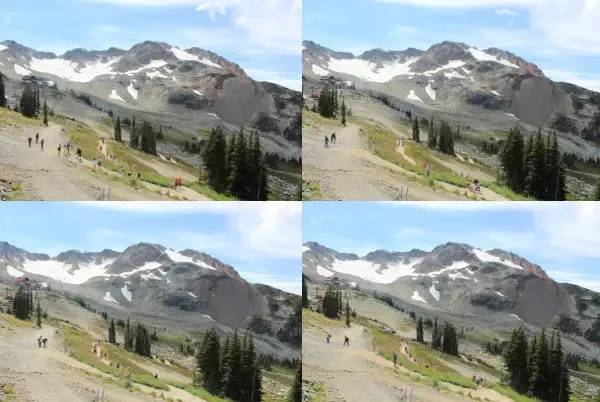
Take at least a dozen photos in your ideal spot, the Too Many Adapters blog recommends. Then head to Photoshop and go to File > Scripts > Statistics. Select “Median” for the stack mode and check “Attempt to Automatically Align Source Images.” Finally, click the “Browse…” button to select your set of photos and hit OK.
Photoshop will process the images to preserve the static background and remove everything that changes between the shots . There might be some cleanup to do in Photoshop but this might be the quickest and easiest way to get postcard-quality photos of your last trip.
After the Trick!
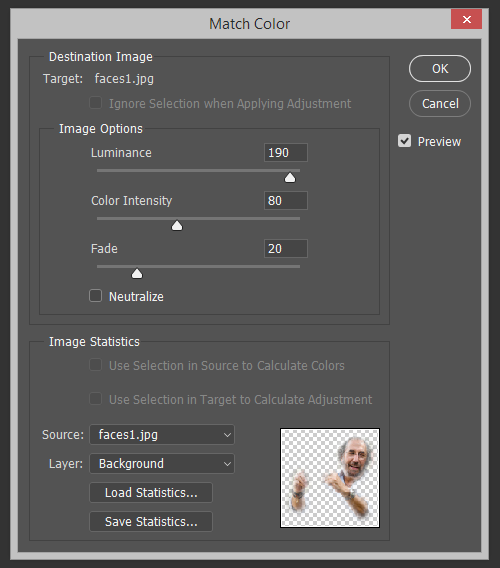
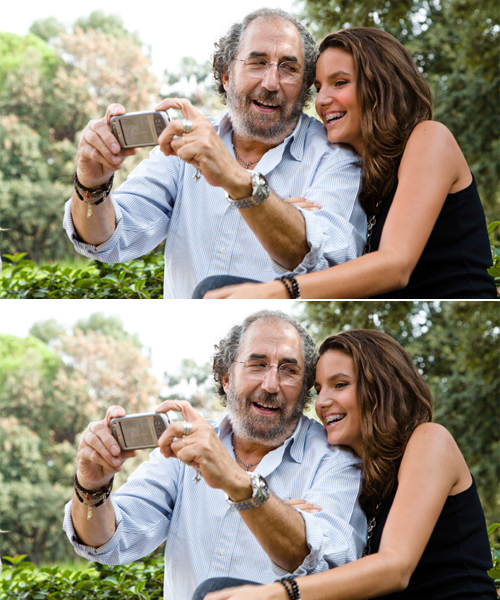
A sunburn or a blush can disrupt a portrait, especially if there is a contrasting pale person nearby. Photoshop has a tool to correct that: “Match Color” offers control over skin tones. Open your image and use the Quick Selection tool to roughly select the red skin areas.
You can hold down the Alt/Option key and subtract areas from the selection. Click on Select → Modify → Feather and enter a value of about 15 pixels. Use the Control/Command + J shortcut to copy the selection to a new layer.
Using the same technique, copy the non-reddened skin to a new layer. In the next step, you’ll have to differentiate between the source layer and the layer to edit, so rename these two layers meaningfully; all it takes is a double-click on the layer name. You could use the naming scheme shown here and call them “Beautiful skin” and “Reddened skin.”
Activate the layer with the red skin, and select Image → Adjustments → Match Color from the menu. For “Source,” select the current document, and for “Layer,” select the one with the beautiful skin. Control the effect using the “Luminance” and “Color Intensity” sliders in the Image Options area. Once you confirm, you can control the effect’s strength with the Opacity slider.
We will be coming up with a whole new world of tricks from out bag on Photoshop and other such tools that a designer must perfect.
Stay tuned for more!